


A malfunctioning water heater can be a frustrating experience, leaving you without hot water for showers, washing dishes, or completing household tasks. While many people rely on professional technicians to handle water heater repairs, there are certain issues that homeowners can troubleshoot and fix on their own. If you’re wondering how to go about fixing your water heater, it’s important to understand the common problems that can occur, as well as the steps to safely identify and resolve them.
This article will guide you through the most common water heater issues, the troubleshooting process, and when it’s best to call a professional. By following these steps, you can determine if your water heater can be fixed with a simple repair or if it’s time to call in an expert.
Common Water Heater Problems
Before you start fixing your water heater, it’s important to understand the potential issues that could be causing the problem. Here are some of the most common water heater issues:
1. No Hot Water
One of the most common complaints is the lack of hot water. This could happen due to various reasons, including a faulty thermostat, broken heating element, or problems with the power supply. It’s essential to narrow down the cause to determine the appropriate repair.
2. Inadequate Hot Water
If your water heater is producing hot water but not enough of it, this may indicate a problem with the thermostat settings or a buildup of sediment in the tank, which can reduce the heater’s efficiency. This problem may also arise if the heating elements are partially faulty.
3. Water Heater Leaks
Leaks around the water heater tank can be a sign of a more serious problem. Over time, the tank can corrode, leading to leaks, especially in older water heaters. A small leak might be repairable, but larger leaks or a leaking tank often require replacement.
4. Strange Noises
If your water heater is making popping, rumbling, or buzzing sounds, it’s likely due to a buildup of sediment at the bottom of the tank. This sediment can trap water, causing it to overheat and create noise. In some cases, cleaning the tank can resolve this issue, but persistent noise could indicate a more serious problem.
5. Water Discoloration
If the water coming from your taps appears rusty or discolored, it could be a sign of sediment or rust buildup inside the tank or the pipes. This issue is common in older water heaters or those with a rusted tank. In this case, the tank may need to be flushed or replaced.
Step-by-Step Guide to Fixing Your Water Heater
Now that you’re familiar with the common water heater issues, here are some basic steps you can follow to troubleshoot and fix your water heater.
Step 1: Turn Off the Power and Water Supply
Before you attempt any repairs on your water heater, it’s crucial to turn off the power or gas supply to the unit. If you have an electric water heater, turn off the power at the circuit breaker. For gas heaters, set the gas valve to the “off” position. Additionally, turn off the water supply valve to prevent flooding while you work on the heater.
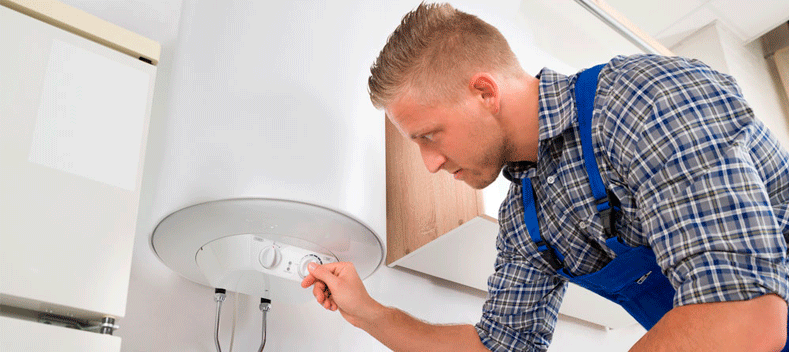
Step 2: Check the Thermostat Settings
If you’re not getting any hot water, one of the first things to check is the thermostat. Sometimes, the thermostat may have been accidentally set too low. For electric water heaters, check both the upper and lower thermostats. If either is set too low, adjust them to the desired temperature (usually around 120°F or 49°C).
If you have a gas water heater, inspect the thermostat and adjust it accordingly. If the thermostat seems to be malfunctioning or stuck, you may need to replace it.
Step 3: Inspect the Heating Elements
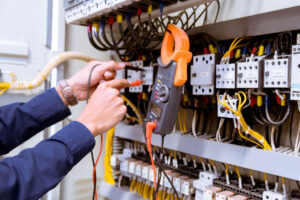
For electric water heaters, heating elements are responsible for heating the water inside the tank. If the water isn’t getting hot, one of the heating elements could be faulty. To check, use a multimeter to test for continuity in the elements. If there’s no continuity, the heating element needs to be replaced.
For gas water heaters, the problem might be with the pilot light or the burner. Ensure the pilot light is lit and the burner is functioning properly. If the pilot light won’t stay lit, the thermocouple may need to be replaced.
Step 4: Flush the Tank
If you’re experiencing inadequate hot water or strange noises, sediment buildup in the tank could be the issue. Flushing the tank helps remove sediment and mineral deposits, which can clog the system and reduce the efficiency of the heater.
To flush the tank, attach a hose to the drain valve at the bottom of the tank and direct it to a drain. Open the valve and allow the water to flow out for several minutes. If you notice a lot of sediment coming out, repeat the process until the water runs clear. Regularly flushing your tank can improve performance and prolong the life of your water heater.
Step 5: Check for Leaks
If you notice water around the base of your water heater, inspect the connections for any leaks. Tighten any loose connections with a wrench and check for signs of corrosion. In some cases, tightening the connections can fix the issue, but in more severe cases, the tank itself may need to be replaced if it’s leaking from the bottom.
Step 6: Replace Faulty Parts
In some cases, certain parts of the water heater may need to be replaced. For example, a faulty thermostat or heating element can prevent your water heater from working properly. If you’ve diagnosed the issue and determined that a part needs to be replaced, make sure you get the correct replacement part for your model. You can find replacement parts at most hardware stores or order them online.
Step 7: Turn Everything Back On
Once you’ve completed the necessary repairs, turn the water and power supply back on. Allow the water heater to fill with water, and then check the temperature settings and confirm that the system is heating up as expected. Monitor the water heater over the next few hours to ensure the problem has been resolved.
When to Call a Professional
While many common water heater problems can be fixed with a little troubleshooting, some issues may require professional help. If you’ve tried the above steps and your water heater is still malfunctioning, or if you notice a large leak or severe rusting, it may be time to call in a professional plumber or technician.
Some signs that you should call a professional include:
- Persistent leaks that can’t be fixed by tightening connections
- A water heater that is old and may need replacing
- Electrical or gas issues that you’re not equipped to handle
- Inability to identify the source of the problem
Conclusion
Fixing your water heater can save you time and money, but it’s important to know when to tackle the issue yourself and when to seek professional help. By understanding common water heater problems and following the necessary troubleshooting steps, you can restore your water heater to full functionality. Regular maintenance, such as flushing the tank and checking the thermostat settings, can prevent many common issues and extend the life of your water heater. However, if the problem persists, don’t hesitate to call a professional to ensure your water heater is working safely and efficiently.